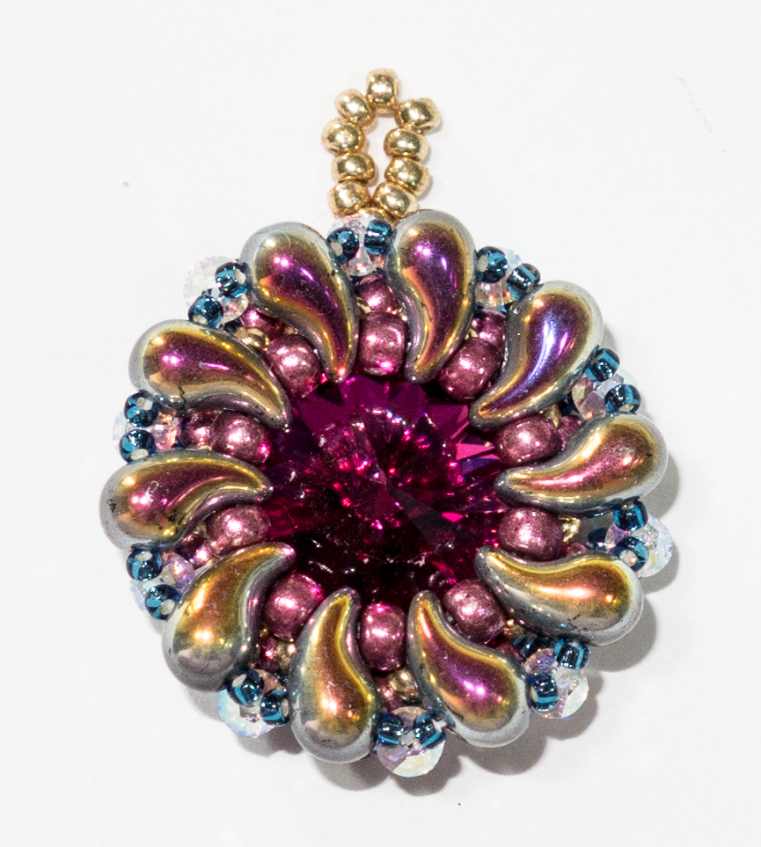
ZOLIDUO Pendant
Material List
10 ZOLIDUO beads ZB
10 SWAROVSKI 5328 bicone beads 3mm SW3
1/2 gram Miyuki Round Seed Beads size 8/0 R8
1 grams Miyuki Round Seed Beads size 11/0 R11
1/2 grams Miyuki Round Seed Beads size 11/0 R11
1 Swarovski Rivoli 14mm
Hook or Magnetic clasp
Fireline 6lb or similar
12# beading needle
Starting your work:
Start with a comfortable thread length. I recommend about 5 feet (about 1.50 meter) for starting.
String a stopper bead leaving about 4" (10 cm) tail. Go through the stopper bead twice to anchor the bead. (Stopper bead is an 11/0 round seed beads different color from those you are working with. This bead you will remove at the end of your work or if mentioned otherwise).
Don’t Forget:
Never use the same thread you worked in your beading project to attach the clasp. Use a new thread. This will assure and allow you to replace the clasp in case in got broken or extend your work, without losing your work.
Adding Thread:
Usually I think it is best to knot the new thread into the work a few beads before the end of the thread. The knot should be between two beads and then continue through the beads that the old thread is coming out of. Only then finish the old thread.
Finishing Added Thread:
Never cut the thread near the knot point. The knot point is a weak point and can be opened. After attaching the new thread between two beads with double knot, I recommend to take the short tail left and pass it back through the beads (at least 2 inches) before cutting.
Finishing your beadwork:
Finish all threads before adding the clasp. Try to leave the beads you will attach the clasp to, free from threads as much as you can.
STEP 1
Pick up 1xZB, 1xR8 x 10 times. Go through all and close to a circle by going through all and knot threads twice.
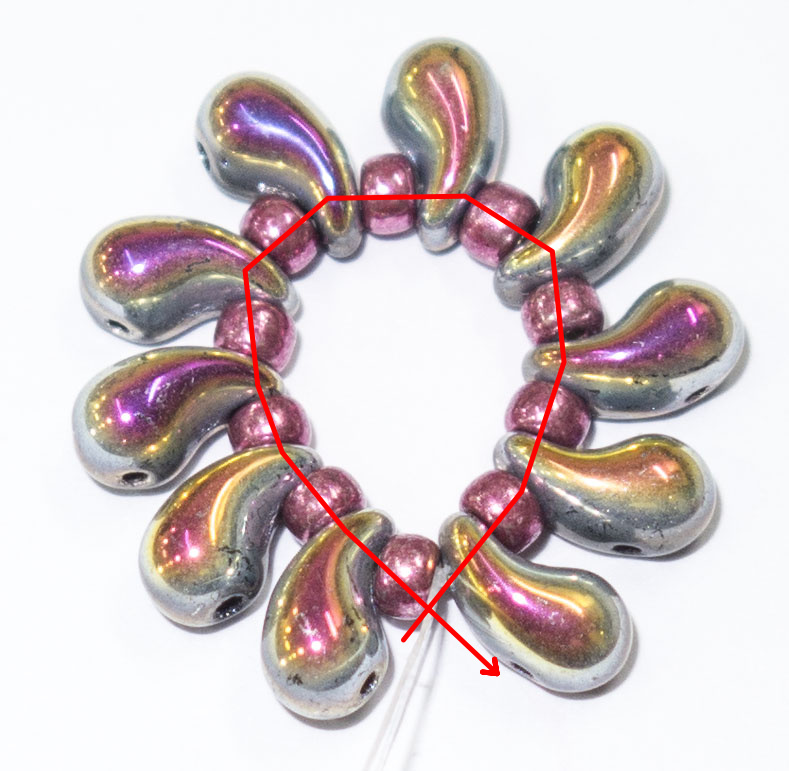
STEP 2
Go through the next R8. Pick up 1xR11, 1xR8, 1xR11. Go through R8 from the back. Continue through the next ZB (same hole) and the following R8 hole. Repeat around.
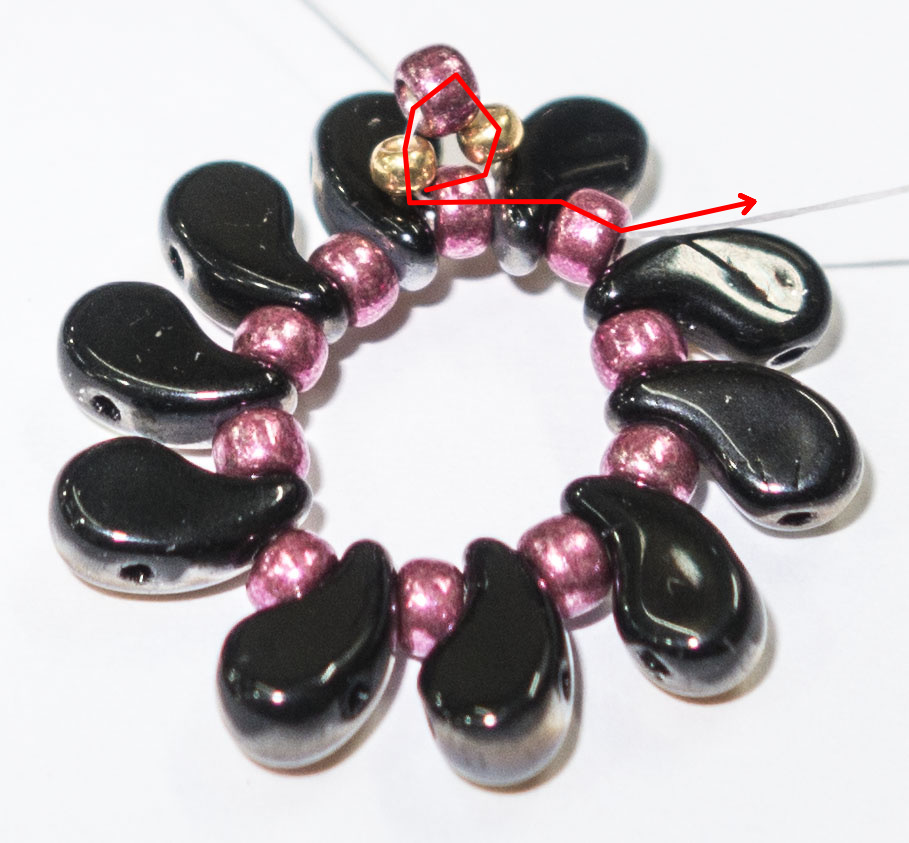
STEP 3
Finish pointing out from the upper R8.
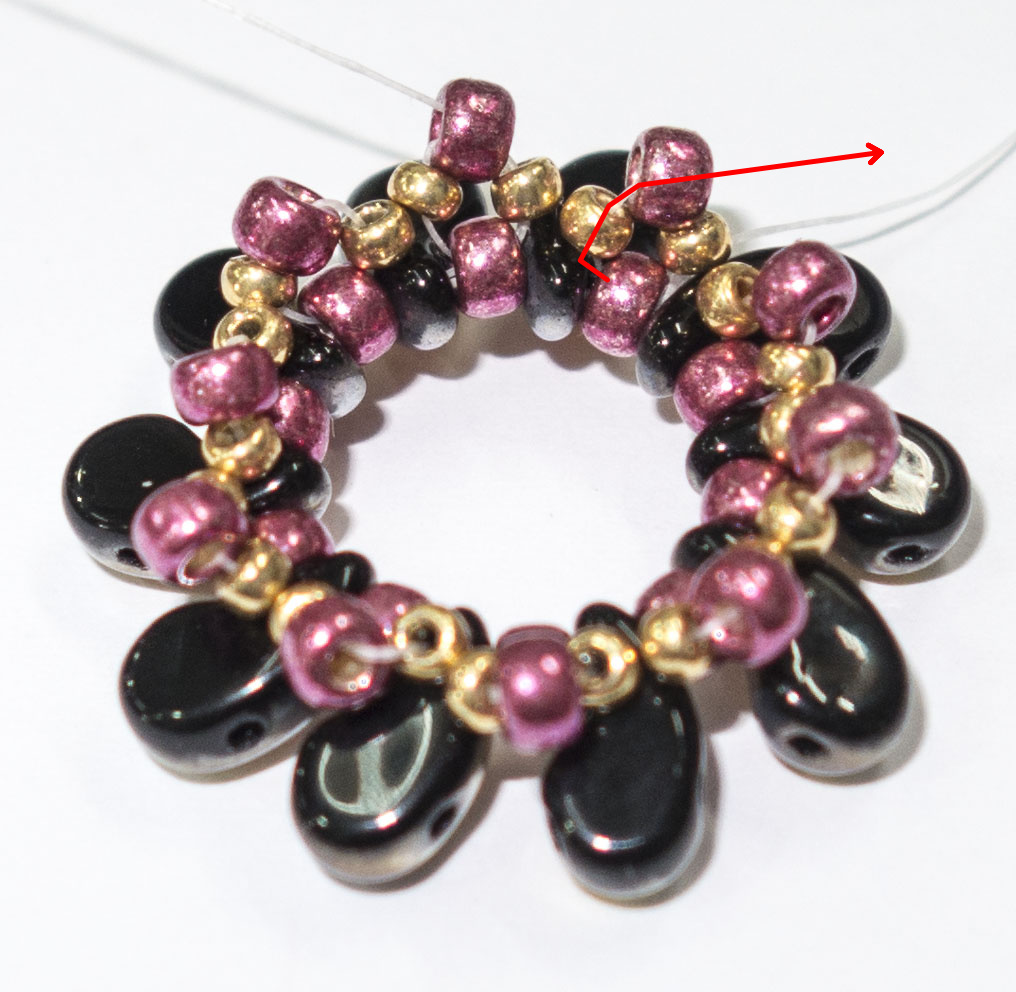
STEP 4
Pick up 1xR15, 1xR11, 1xR15. Go through the next upper R8. Finish pointing out from first R11 you just added.
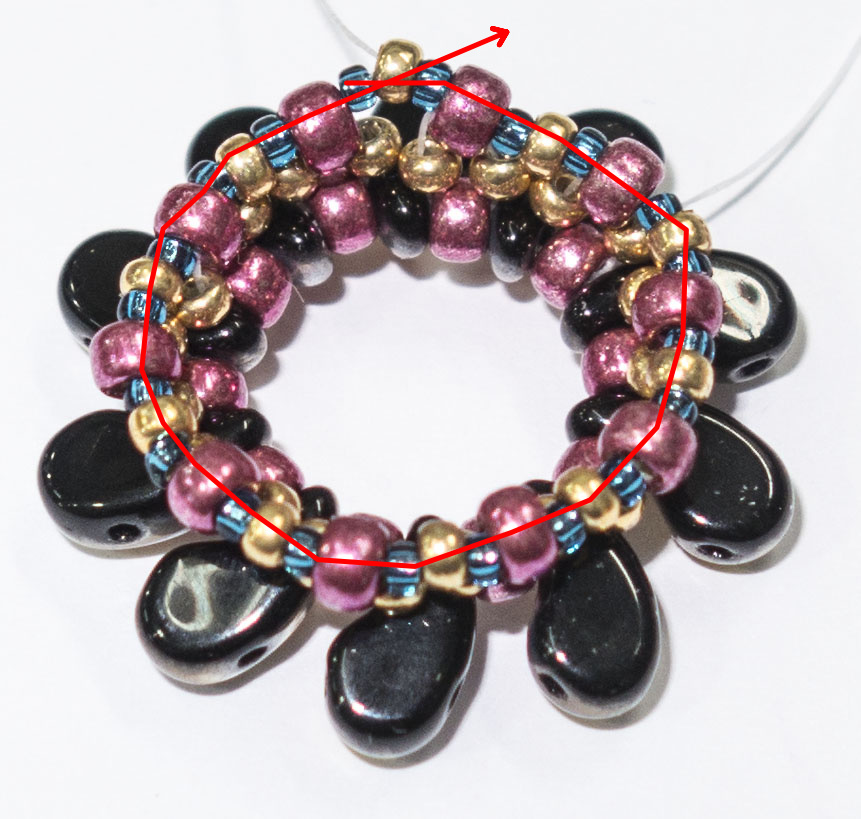
STEP 5
Pick up 2xR11. Go up through the next R11. Repeat around. Finish pointing out from the first 2xR11 you added in this step.
STEP 6
Pick up 1xR15. Go through the next 2xR11. Repeat around. Finish pointing out from R8
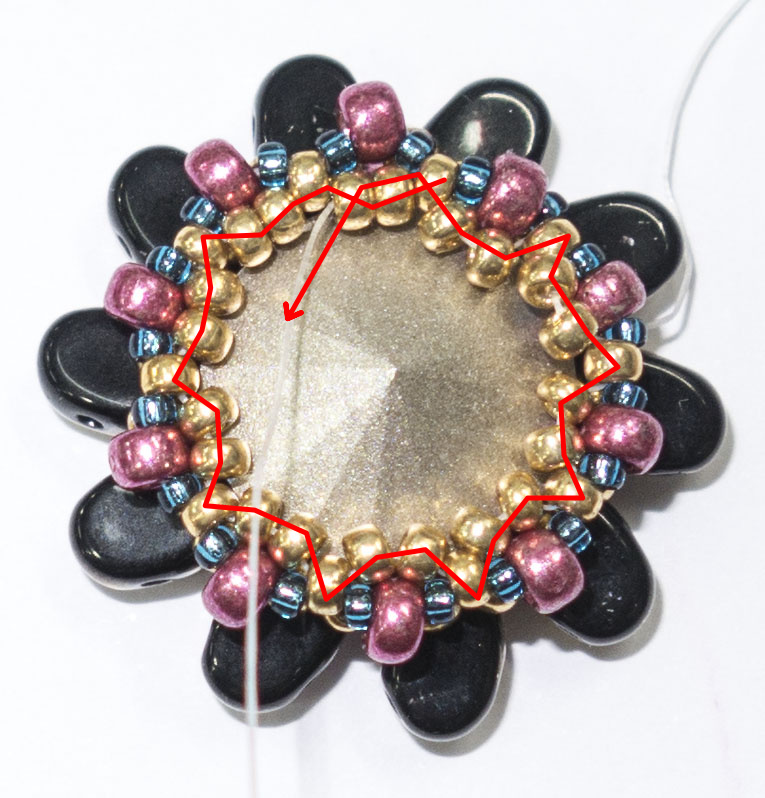
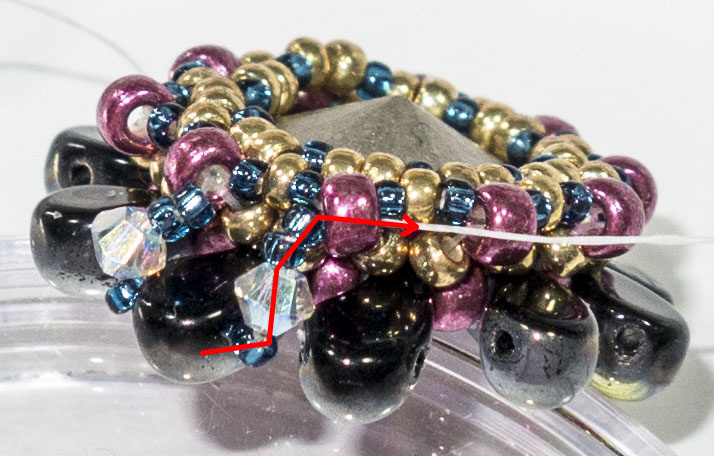
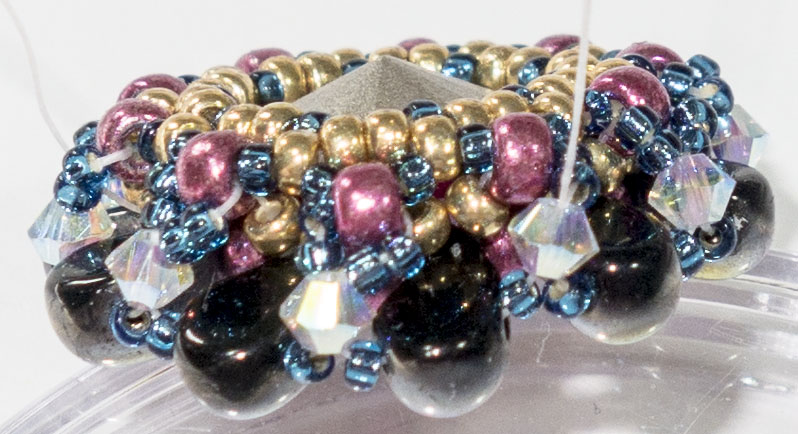
STEP 7
Pick up 2xR15, 1xSW3, 1xR15. Go through the free hole of the ZB.
STEP 8
Pick up 1xR15, 1xSW3, 2xR15. Go through the next R8..
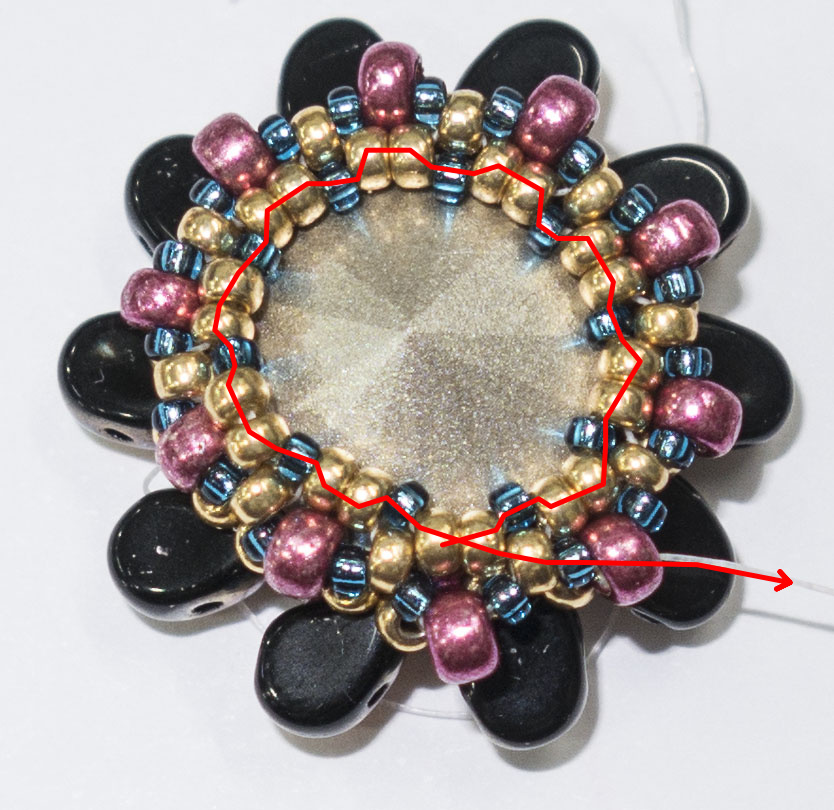
STEP 9
Pick up 2xR15. Go back through the SW3.
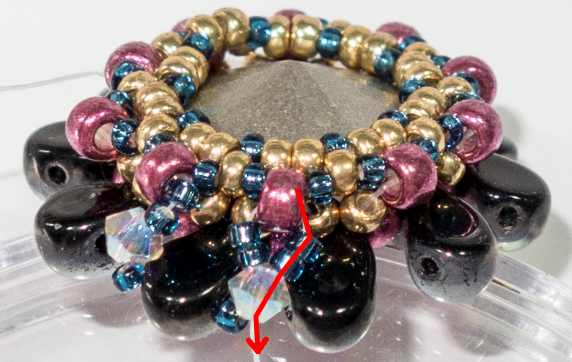
STEP 10
Pick up 1xR15. Go through the free hole of the ZB.
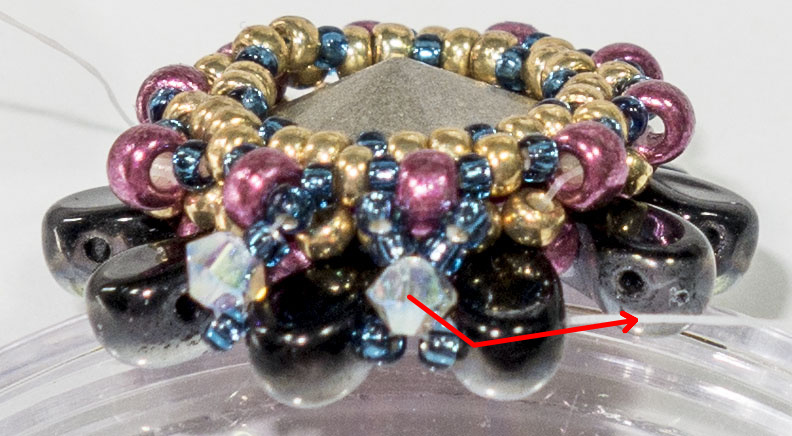
STEP 11
Repeat steps 8-10 until you reach the start.
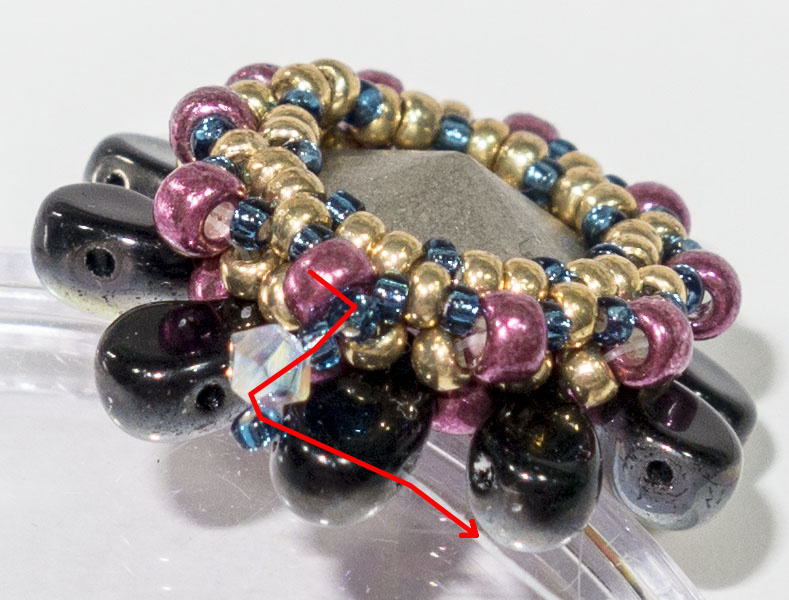
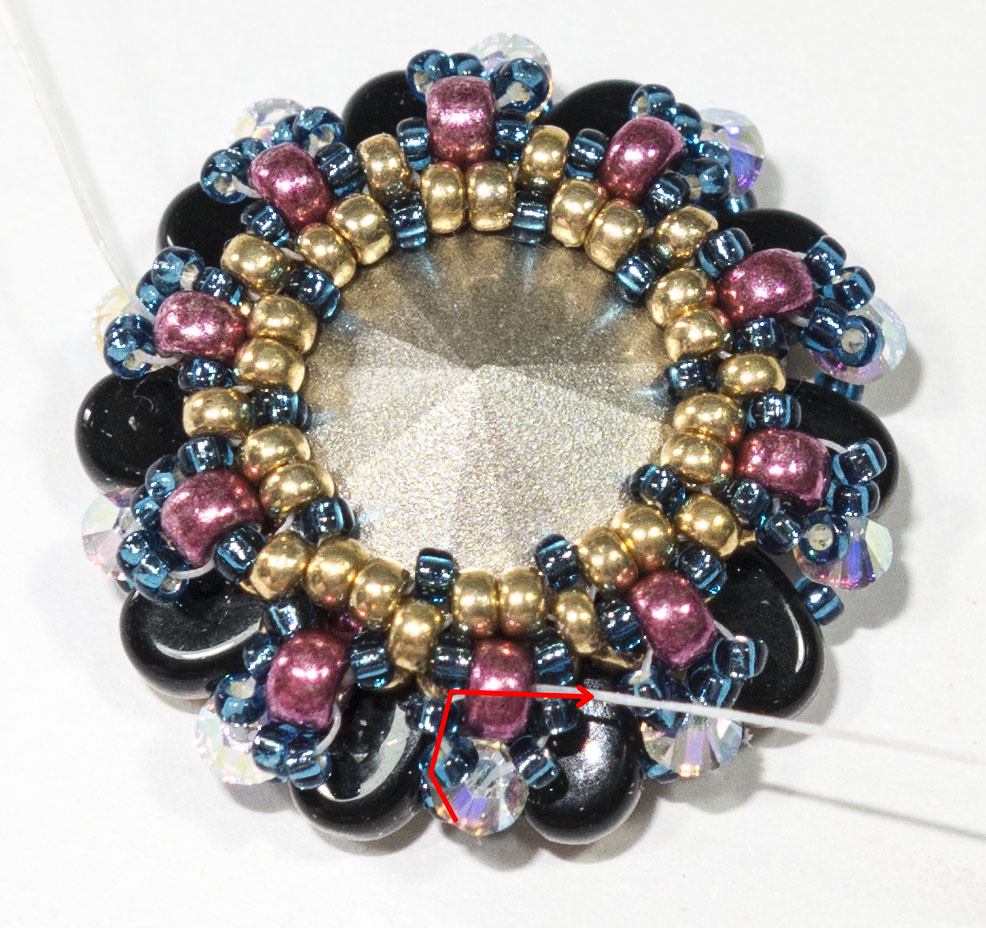
STEP 12
Pick up 1xR15. Go through the first SW3 you added in step 7.
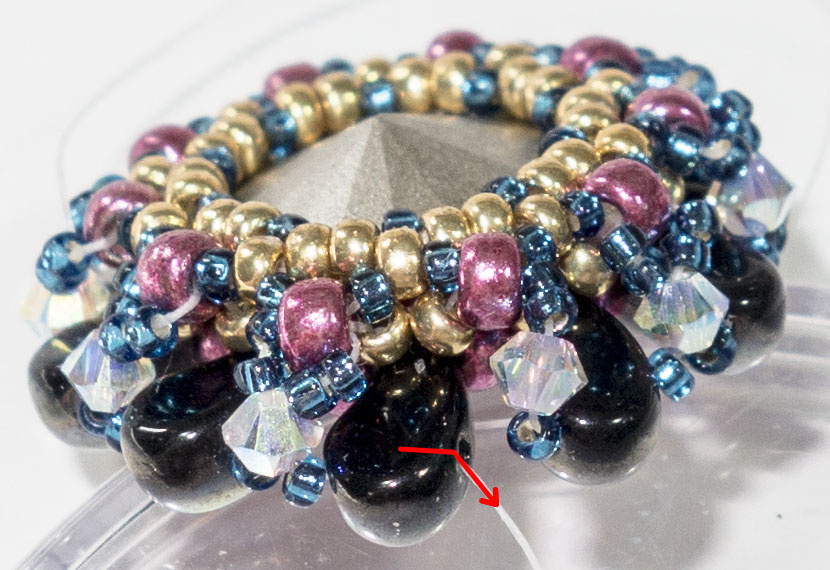
STEP 13
Pick up 2xR15. Go back through the R8.
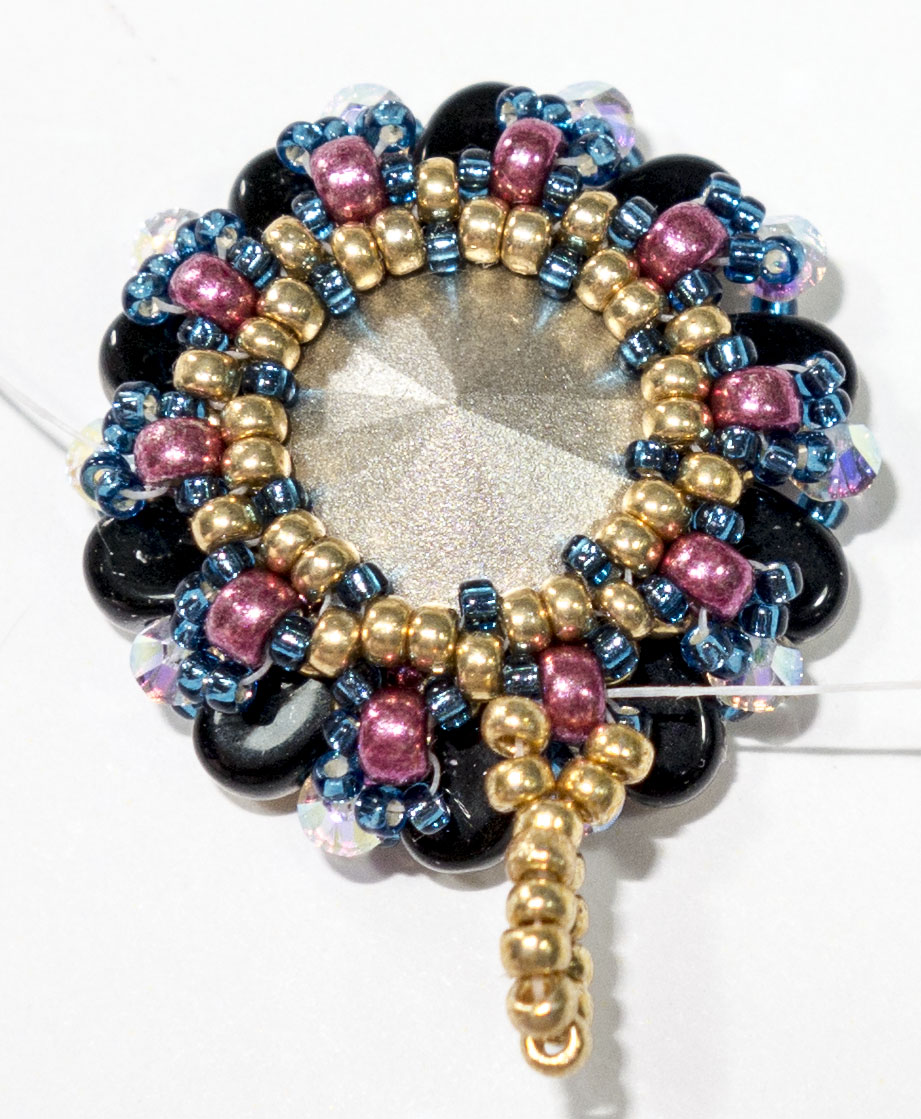
STEP 14
Pick up 12xR11. Go back through the third R11 from start. Pick up 2xR11. Go through the R8 but from the back. Go through all one more time to inforce the loop. Finish the thread.

Enjoy your Beading!
For more Jewelry Patterns & Kits, beading supply please visit my shops:
http://www.etsy.com/shop/bead4me
Important: Purchasing this pattern, you have agreed to use it only for your personal, non-commercial use. The purchase of this pattern does not give you permission to copy, duplicate or sell this pattern. ©All rights reserved, apply to the design and illustrations of this pattern Created by Isabella Lam